Virtual Environments
One thing that I’ve found in my transition into Data Science is that no matter how many classes and bootcamps and projects you do, not many resources (that I’ve found so far) really dive into virtual environments and how to incorporate them into your data science workflow. Either there is no mention of them and thus are either deemed unnecessary, favouring diving into the “meat” of the project or task at hand, or are expected prior knowledge. In this post, I hope to elucidate the importance of a virtual environment, how to go about setting one up for Python Data Science projects, and also the process of managing and maintaining an environment. Please note that there are several ways of setting up virtual environments, and different setups may be more or less optimal for other users, but I will cover venv and conda, which I believe are the most accessible, and should be more than enough to get you started. If you’re in Windows, a) I’m sorry, and b) perhaps this resource would be more useful for you.
What is a virtual environment, and why should I care?#
Much like it sounds, a virtual environment is an isolated environment, segregated from your global machine, that allows for version control – particularly in relation to individual projects. Since Python can release 10 or more new versions a year, maintaining some kind of consistency is crucial when you want assurance that your work is unaffected by changes when an update has taken place. Nothing is worse than realising that your system has updated, going back to a project that needs a small tweak, and realising that there are more breaks than you know what to do with. Whether you use your work or home computer for your Python projects, your system can also become a little crowded with packages and libraries – especially if you’re like me and can’t wait to get your teeth into a new project – and managing the different dependencies of interrelated libraries and packages can be exhausting. From a backend perspective, there is also the consideration of where these modules are stored. Modules imported in Python (using the import function) are stored in a different location to packages imported at the command-line using pip – the difference lies in whether the modules are part of the Python standard library or not. I won’t go into this any further here, but I will refer you to this article
if you’re interested in learning more.
Knowing what each project actually needs is important when you’re building out projects for another user, team, or client. A virtual environment allows you to monitor your imported libraries, controls which version of Python you are using and manages dependencies with different packages, and ultimately allows you to pass on the requirements of a project alongside the project code itself. It also allows for you to set up different dependencies for different projects (have a client that only works in Python2? No problem!).
Which virtual environment is right for me?#
In this tutorial, I’m going to cover two different virtual environments. The first, venv is available by default in Python 3.3 or later. conda environments, on the other hand, can be powerful when used alongside Jupyter notebooks, since it acts as both a package and environment manager and is language agnostic.
Honestly, there is no “best” environment, and your choice will likely come down to how much setup and maintenance you’re comfortable with, as well as whether you need the additional features that virtualenv and conda provide.
Using and managing virtual environments – the workflow with venv#
Ok, so I’m starting a new project, which I’m going to call my-awesome-ds-project. If you’re new to data science, I highly recommend taking a look at cookie cutter data science
as a structure for your data science projects. I modify mine slightly to look like this:
my-awesome-ds-project
|––README.md
|––data				#data dump, raw, interim, and processed data
|––models			#trained models, model predictions
|––notebooks		#Jupyter notebooks
|––references 		#explanatory material
|––reports			#presentations, reports, figures
|––src				#source code, scripts for use in the project
|––tests			#making sure my code does what I think it does
So far, so good! To set up a virtual environment, all you need to do is navigate to your project directory and execute the venv module (I’m going to call mine awesome_venv, but feel free to name it whatever you please):
% cd my-awesome-ds-project
% python3 -m venv awesome_venv/
Now your new directory awesome_venv is inside your project folder:
my-awesome-ds-project
|––README.md
|––awesome_venv		#oh, hello there
|––data
|––models
|––notebooks
|––references
|––reports
|––src
|––tests
Now, if you were to take a peek inside your new venv folder, it would look something like this:
awesome_venv
├── bin
│   ├── activate
│   ├── activate.csh
│   ├── activate.fish
│   ├── easy_install
│   ├── easy_install-3.5
│   ├── pip
│   ├── pip3
│   ├── pip3.5
│   ├── python -> python3.5
│   ├── python3 -> python3.5
│   └── python3.5 -> /Library/Frameworks/Python.framework/Versions/3.5/bin/python3.5
├── include
├── lib
│   └── python3.5
│       └── site-packages
└── pyvenv.cfg
Not wanting to overcomplicate things here, but an overview of the three main subfolders:
bincontains files that interact with the virtual environmentincludecontains C headers that compile the Python packageslibcontains a copy of the Python version along with thesite-packageswhere each module or package is managed
To activate the new virtual environment, we need to use the bin/activate path:
% source awesome_venv/bin/activate
(awesome-venv) %
Look at that! The command line prompt now shows that you’re working inside your virtual environment. Now we can really get our teeth into our project!
By default, only pip and setuptools are installed inside a virtual environment, so any additional library you need to use will need to be installed separately, using the pip install method below.
If you’re used to doing all your code at the command line or in .py files, then you can work on your project as usual at this point. But if you’re using Jupyter notebooks, then a little more setup is required.
While in your virtual environment, run the following, which will install the jupyter notebook onto your virtual environment (you will only need to do this once per virtual environment you set up):
(awesome-venv) % pip install jupyter notebook
(awesome-venv) % pip install ipykernel==4.8.2 #syntax for installing a specific version
(awesome-venv) % python -m ipykernel install --user
(awesome-venv) % jupyter notebook notebooks/my-file.ipynb #leave the last argument blank to open a new notebook
This gets you up and going straight away, without needing to go through the Anaconda system. The ipykernel module allows you to use your virtual environment from within Jupyter notebooks.
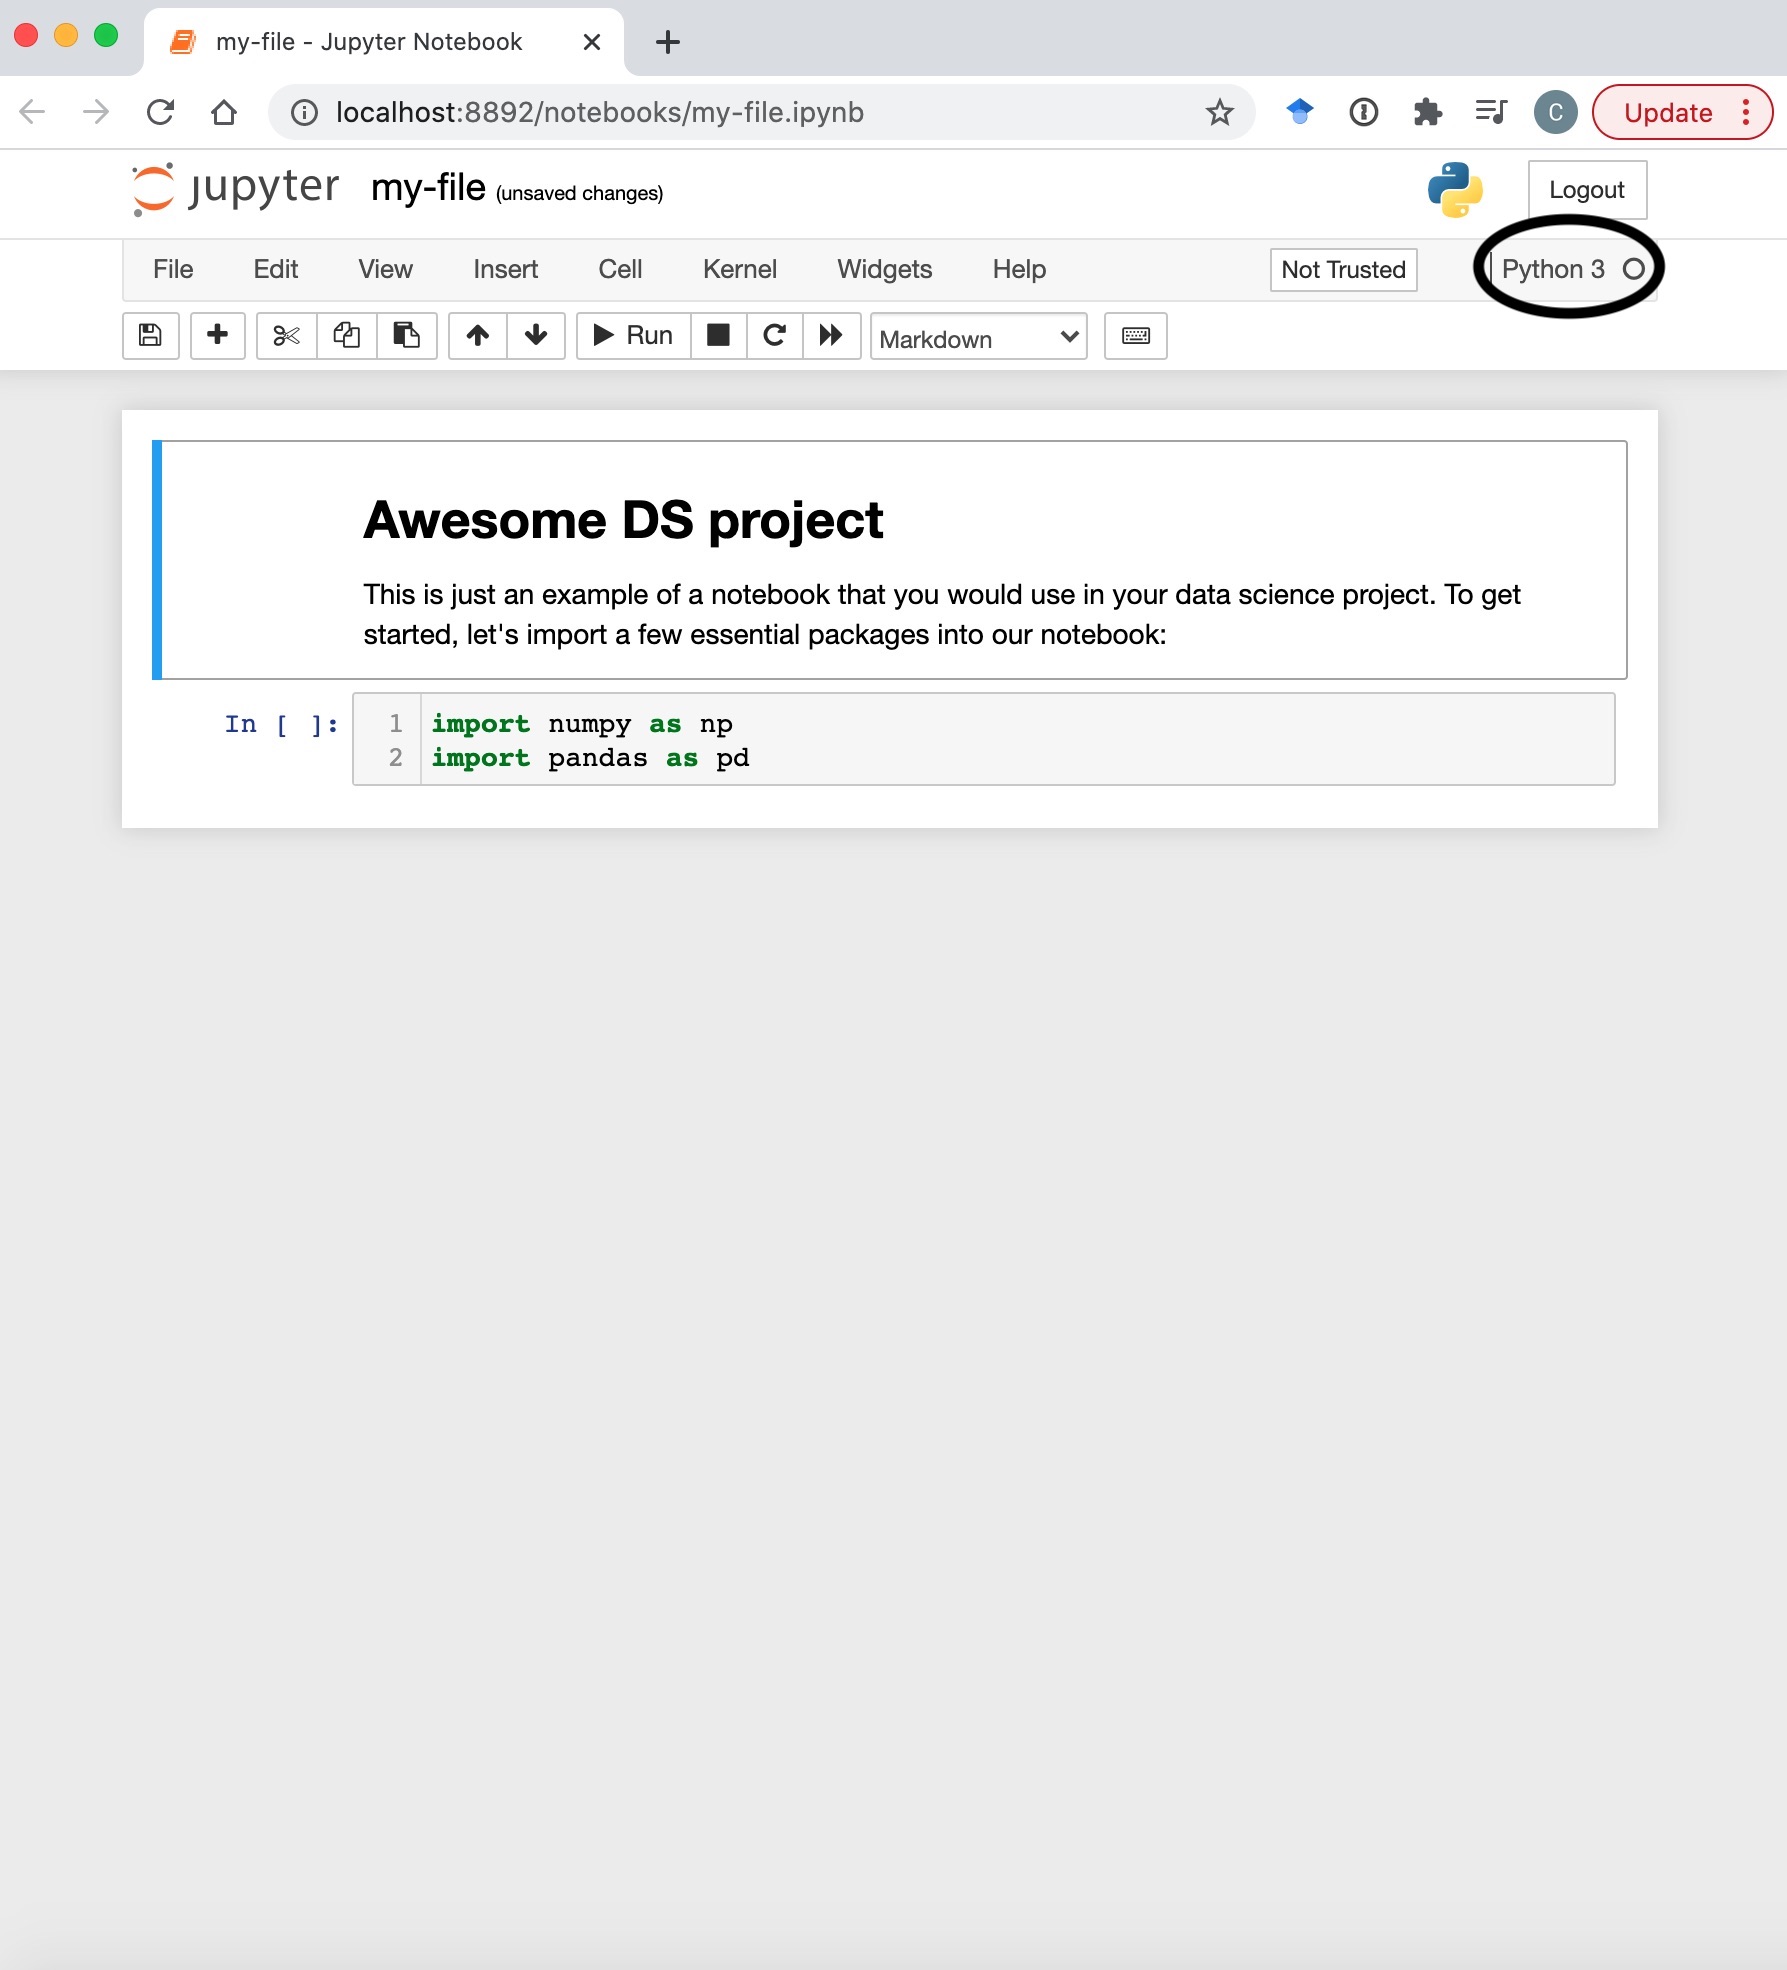
So, here are the bare bones of a notebook. First of all, you can see in the top right corner that we are in the global Python3 kernel (it’s not obvious, but all will become clear in a moment)
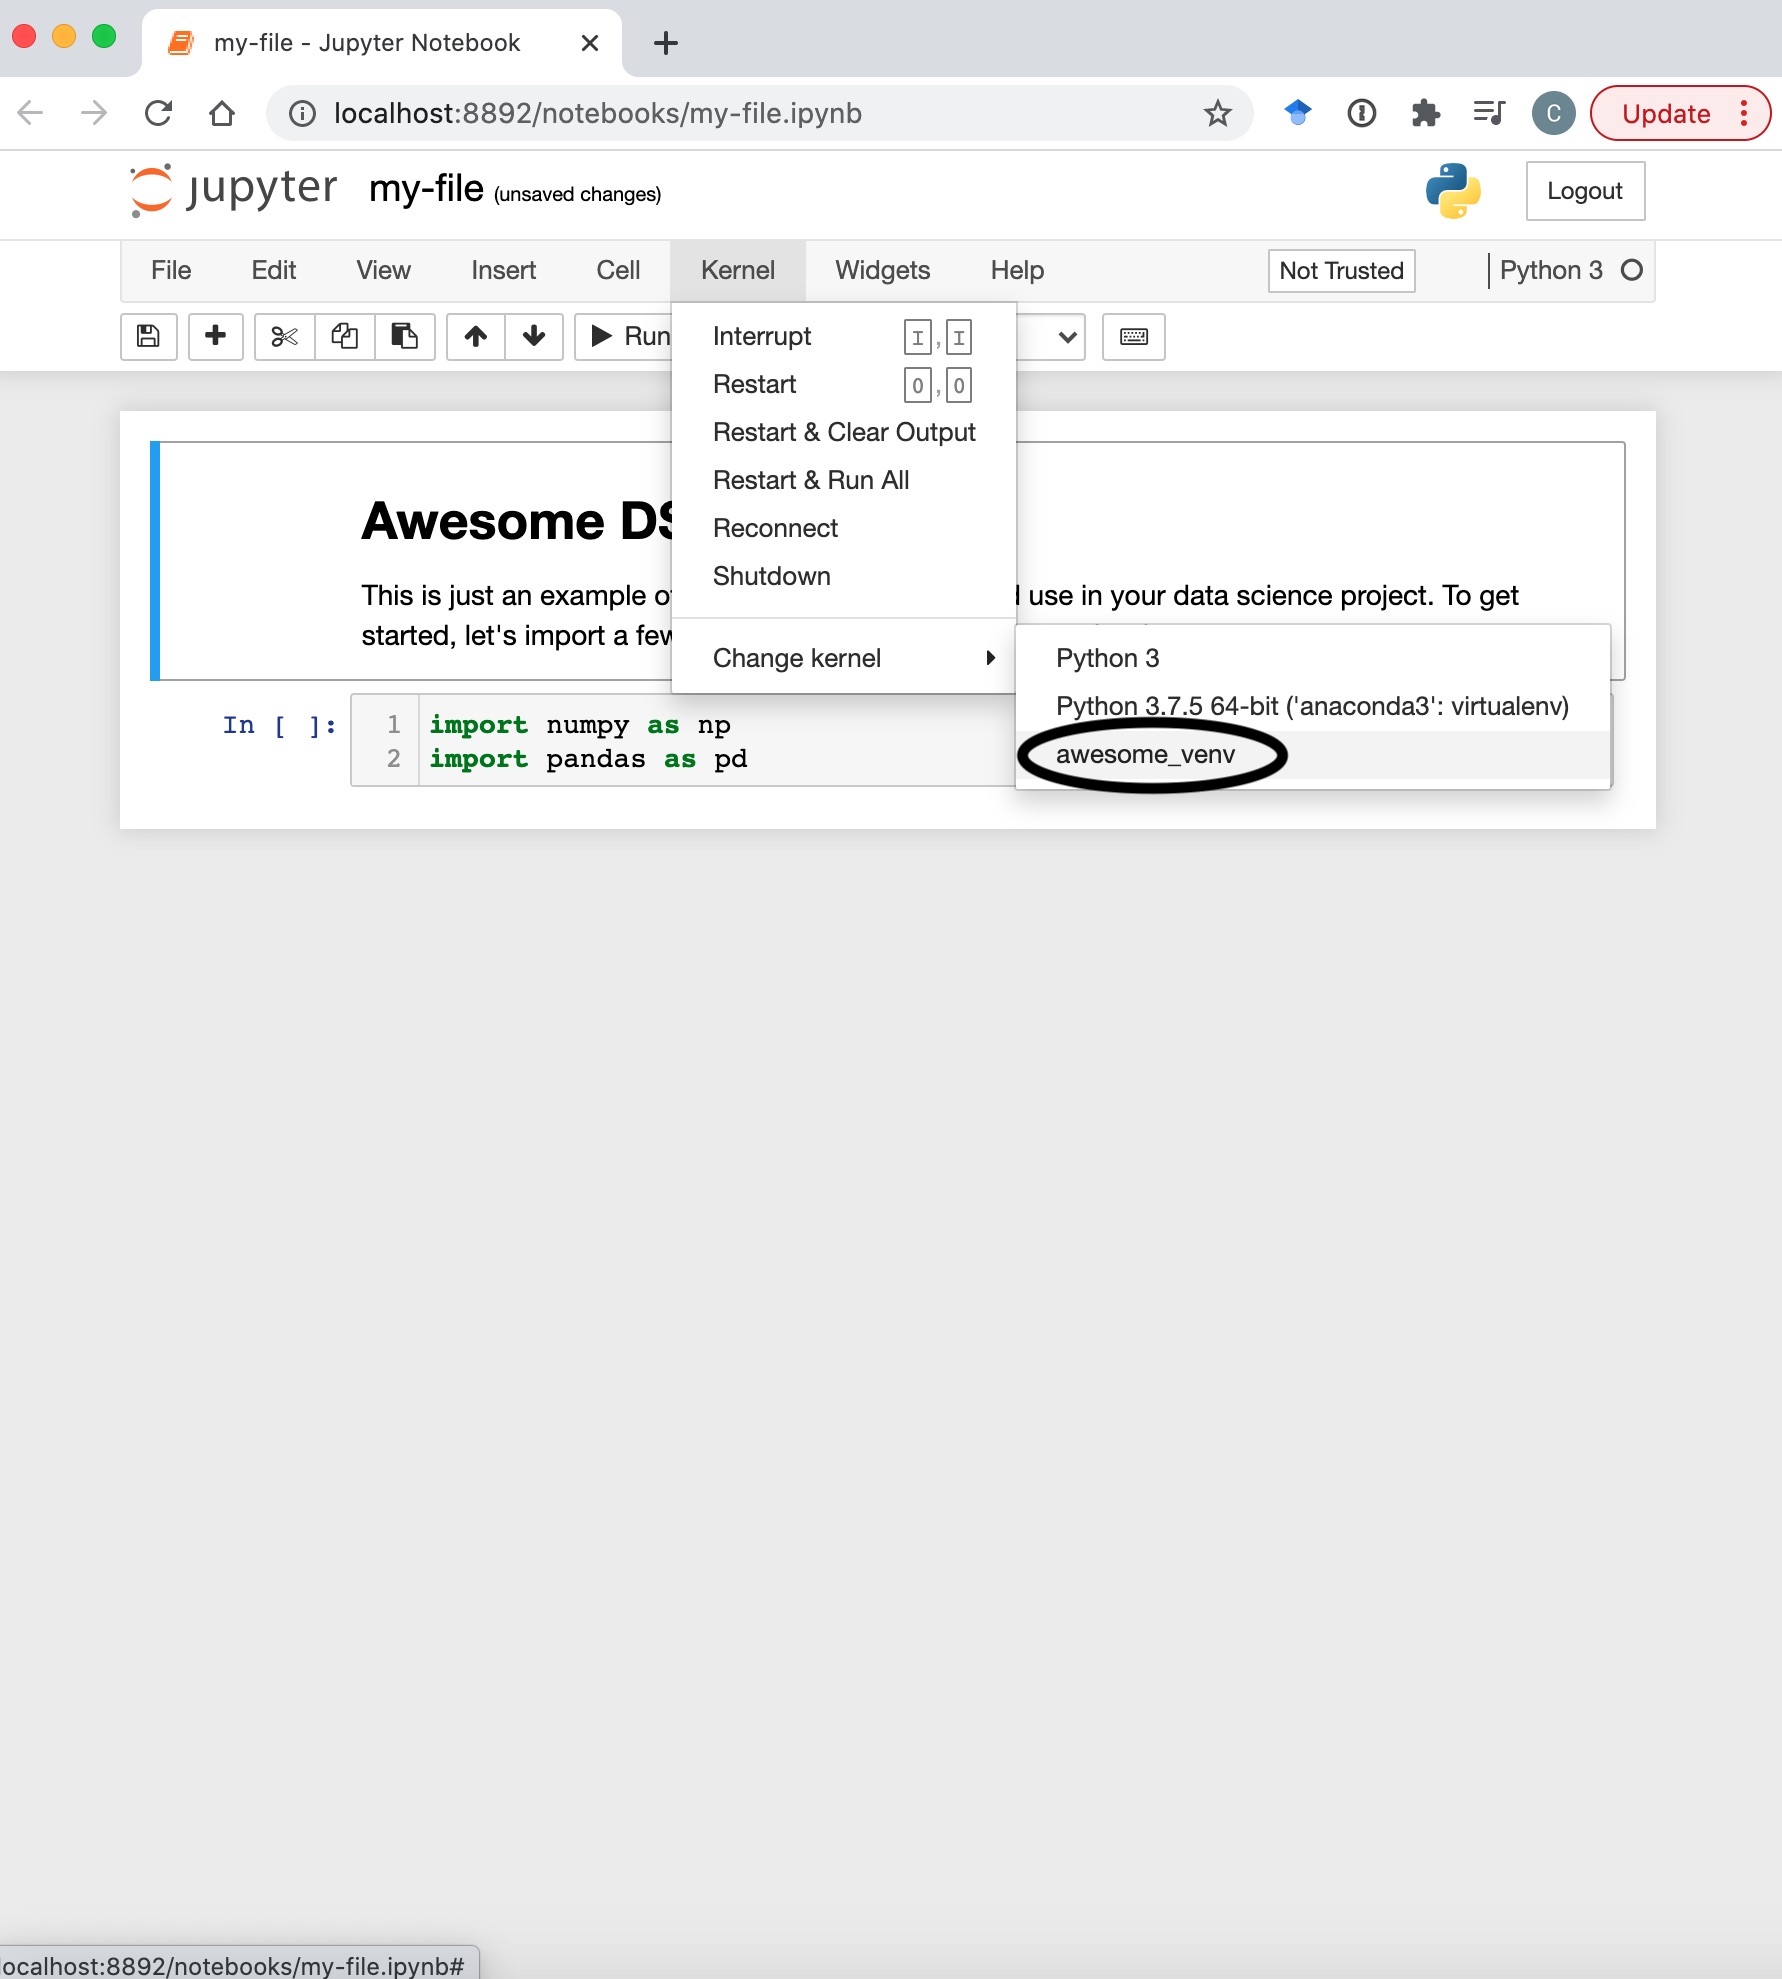
 From there, you just need to switch into the venv from the kernel menu:
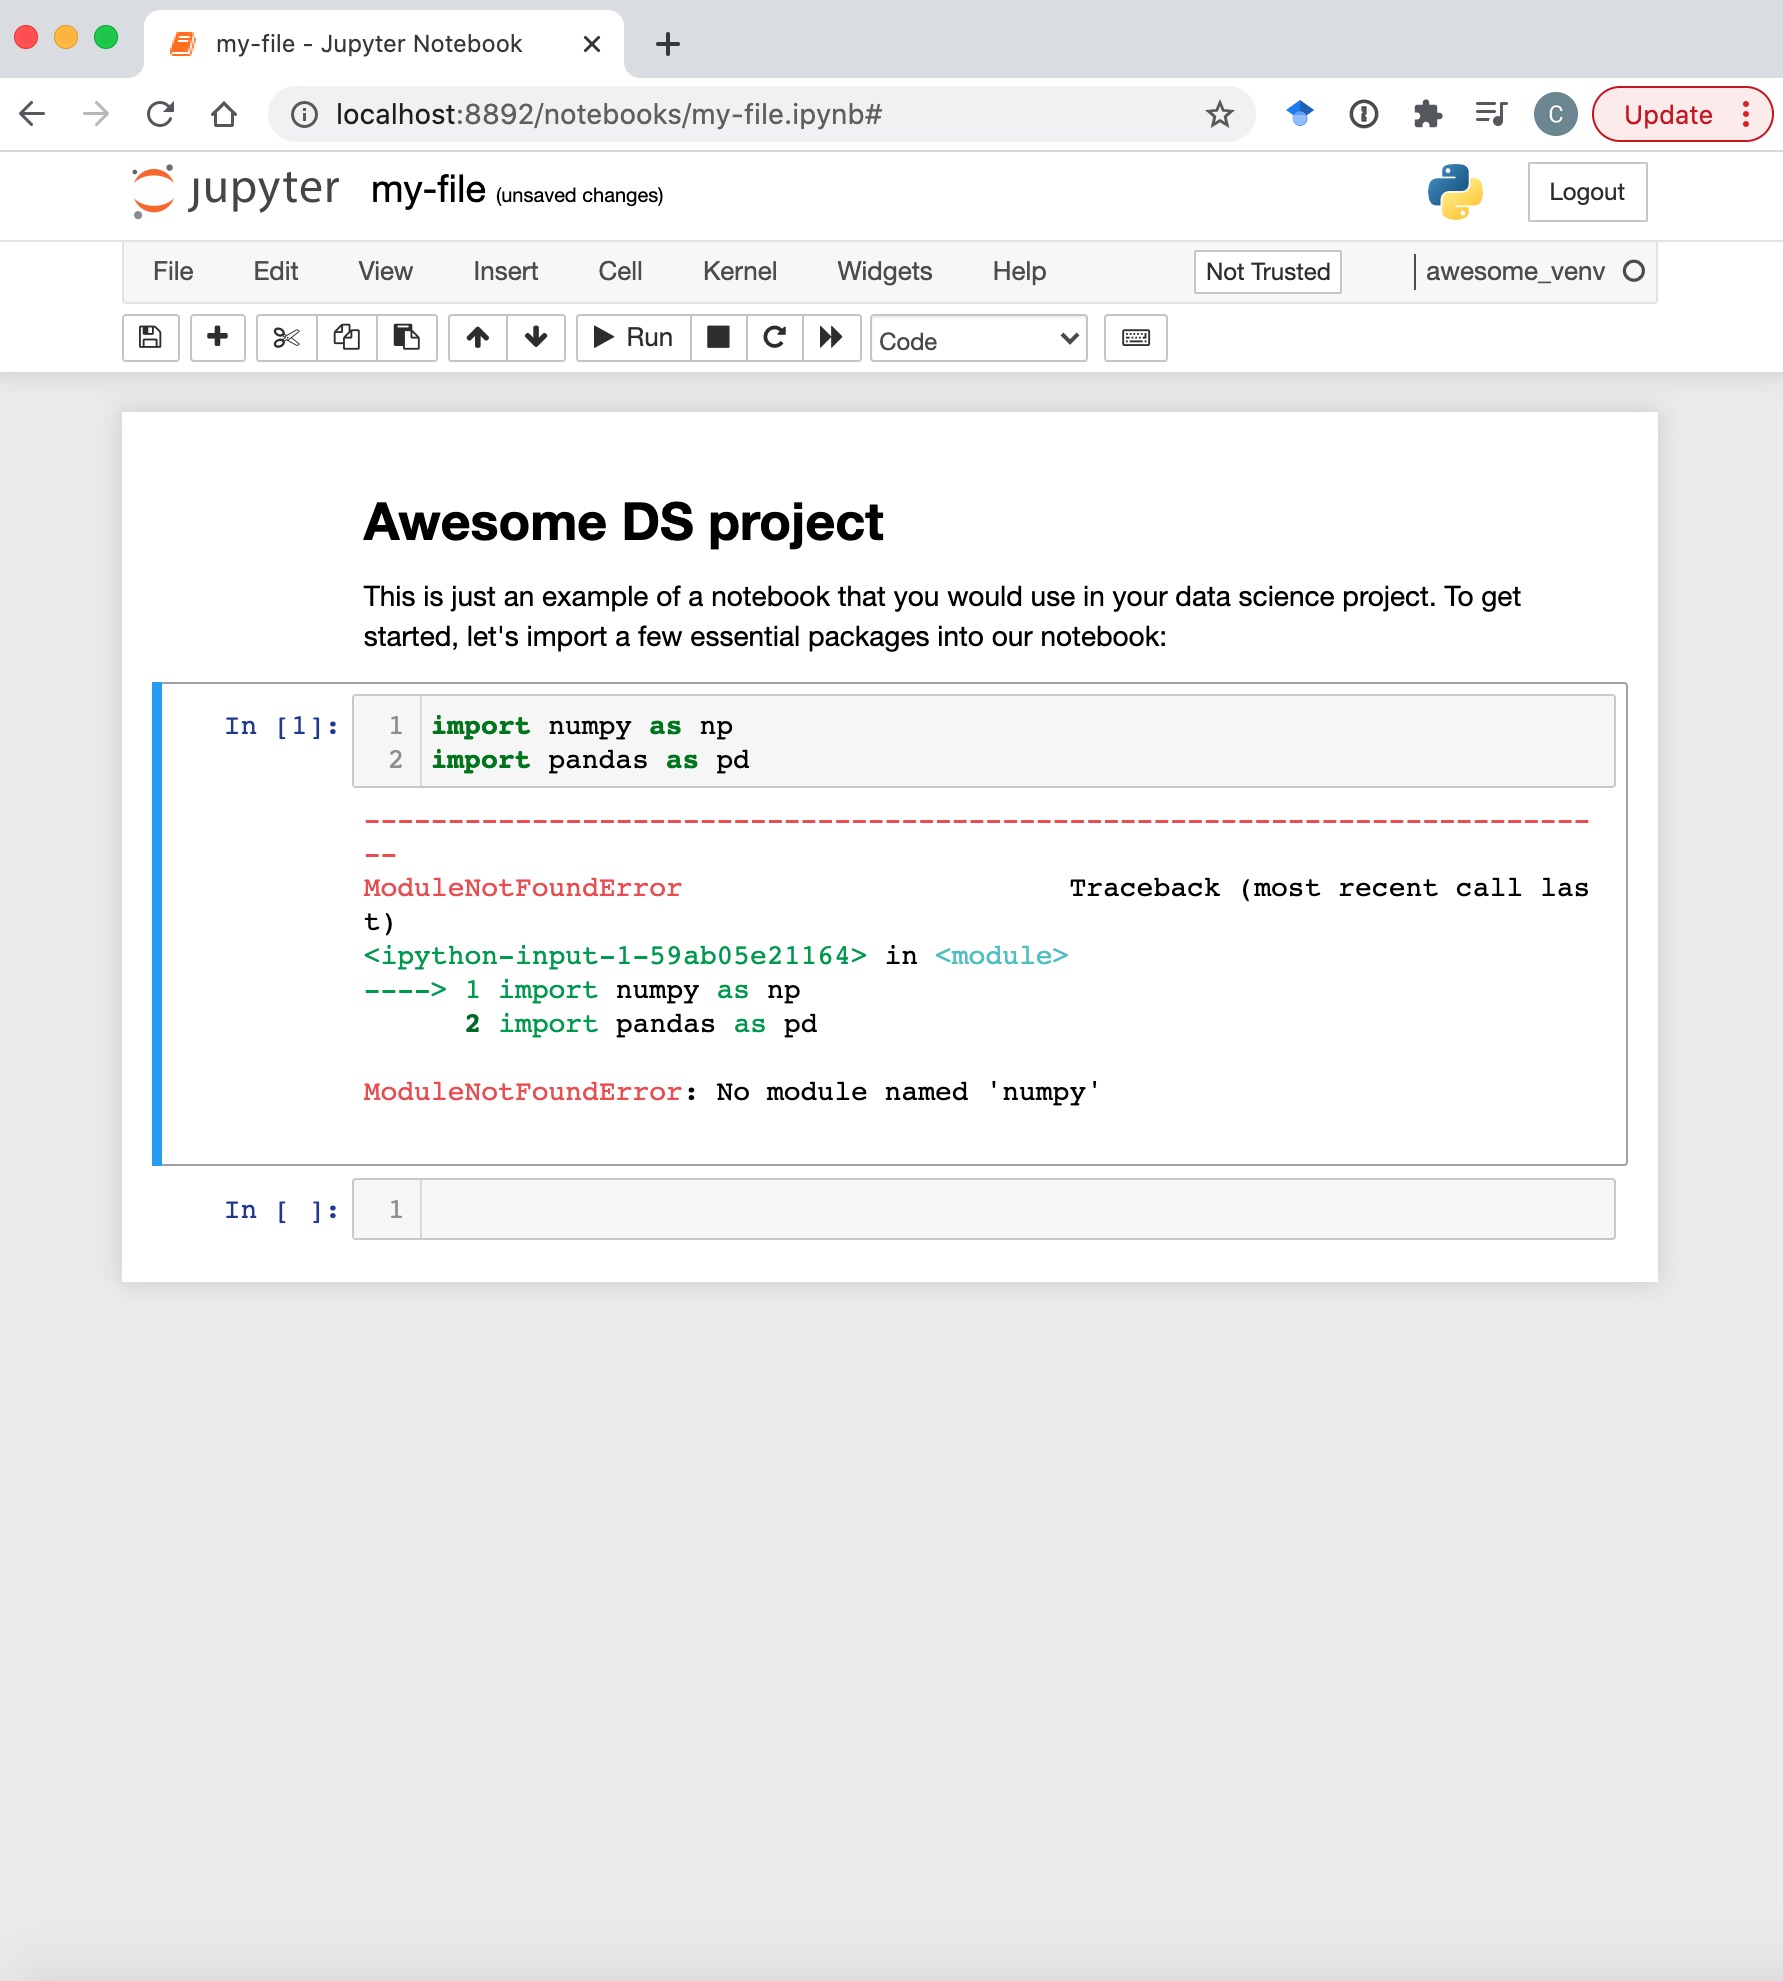
 Now that your environment is set up, you can almost work on your projects as normal – just remember to install the modules you use before you use them, otherwise you will have a horrible warning message:
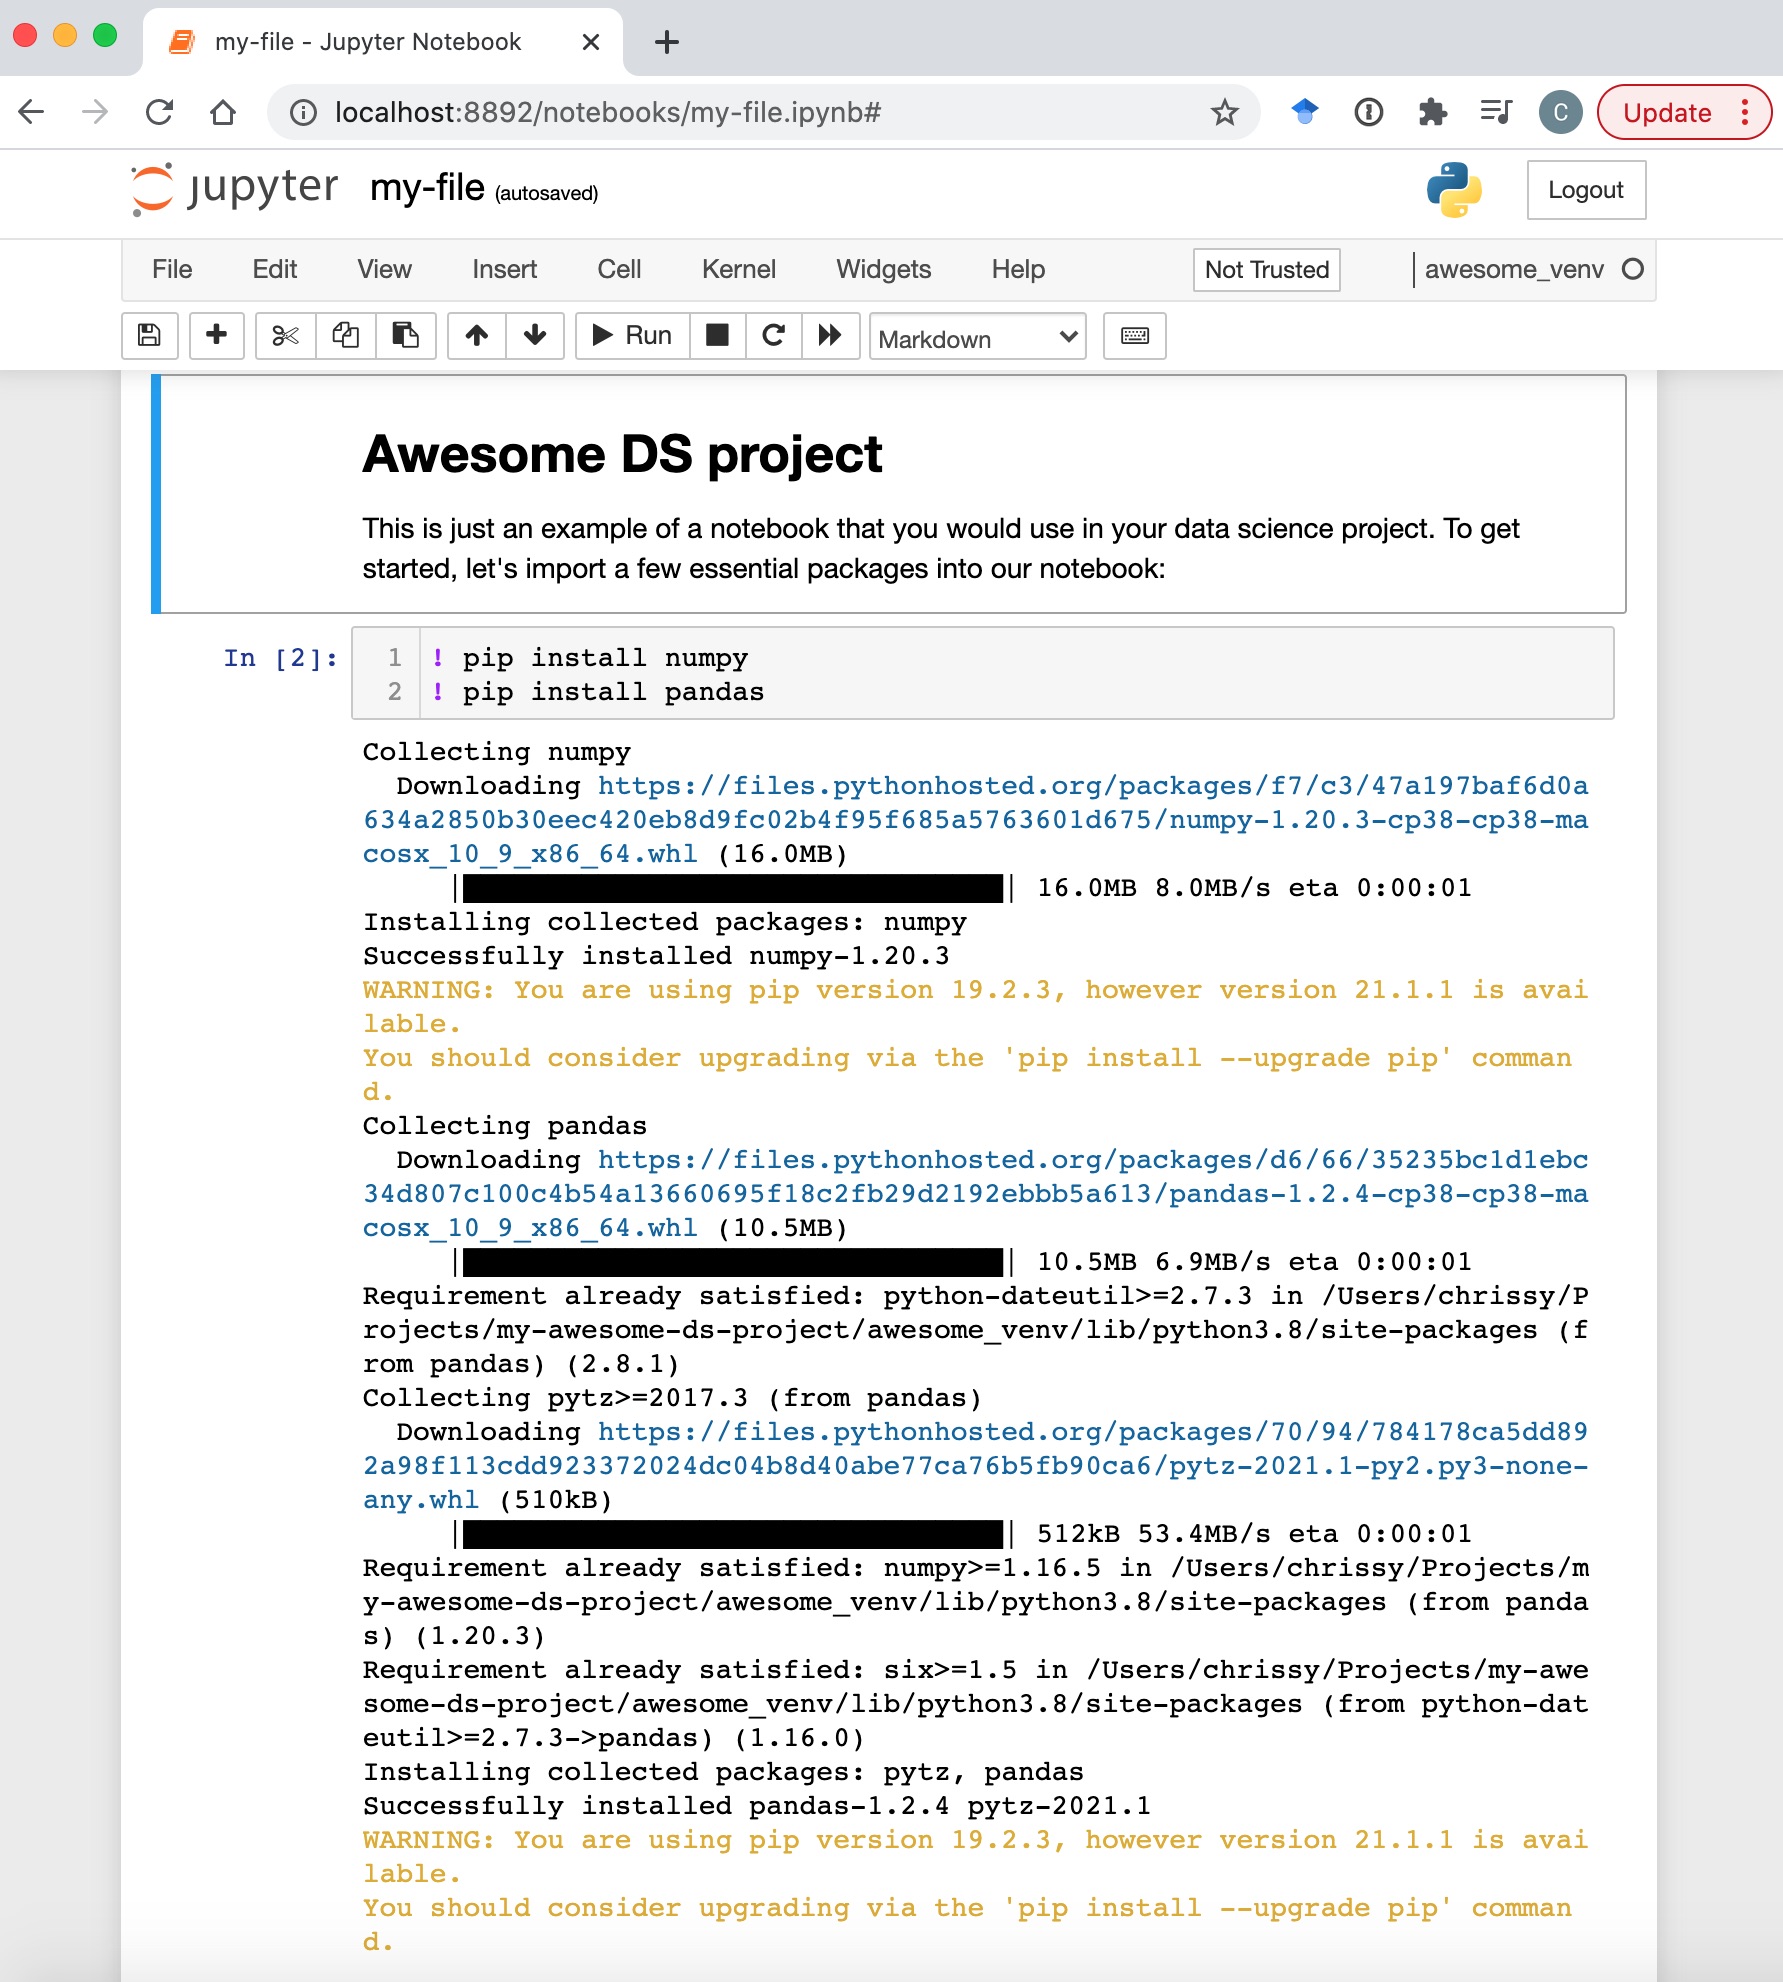
 To do this inside Jupyter notebooks, use the following command (the
 ! allows you to use command line arguments from within your notebook)
 You can then continue with your project (I’m still mourning the end of Schitt’s Creek)
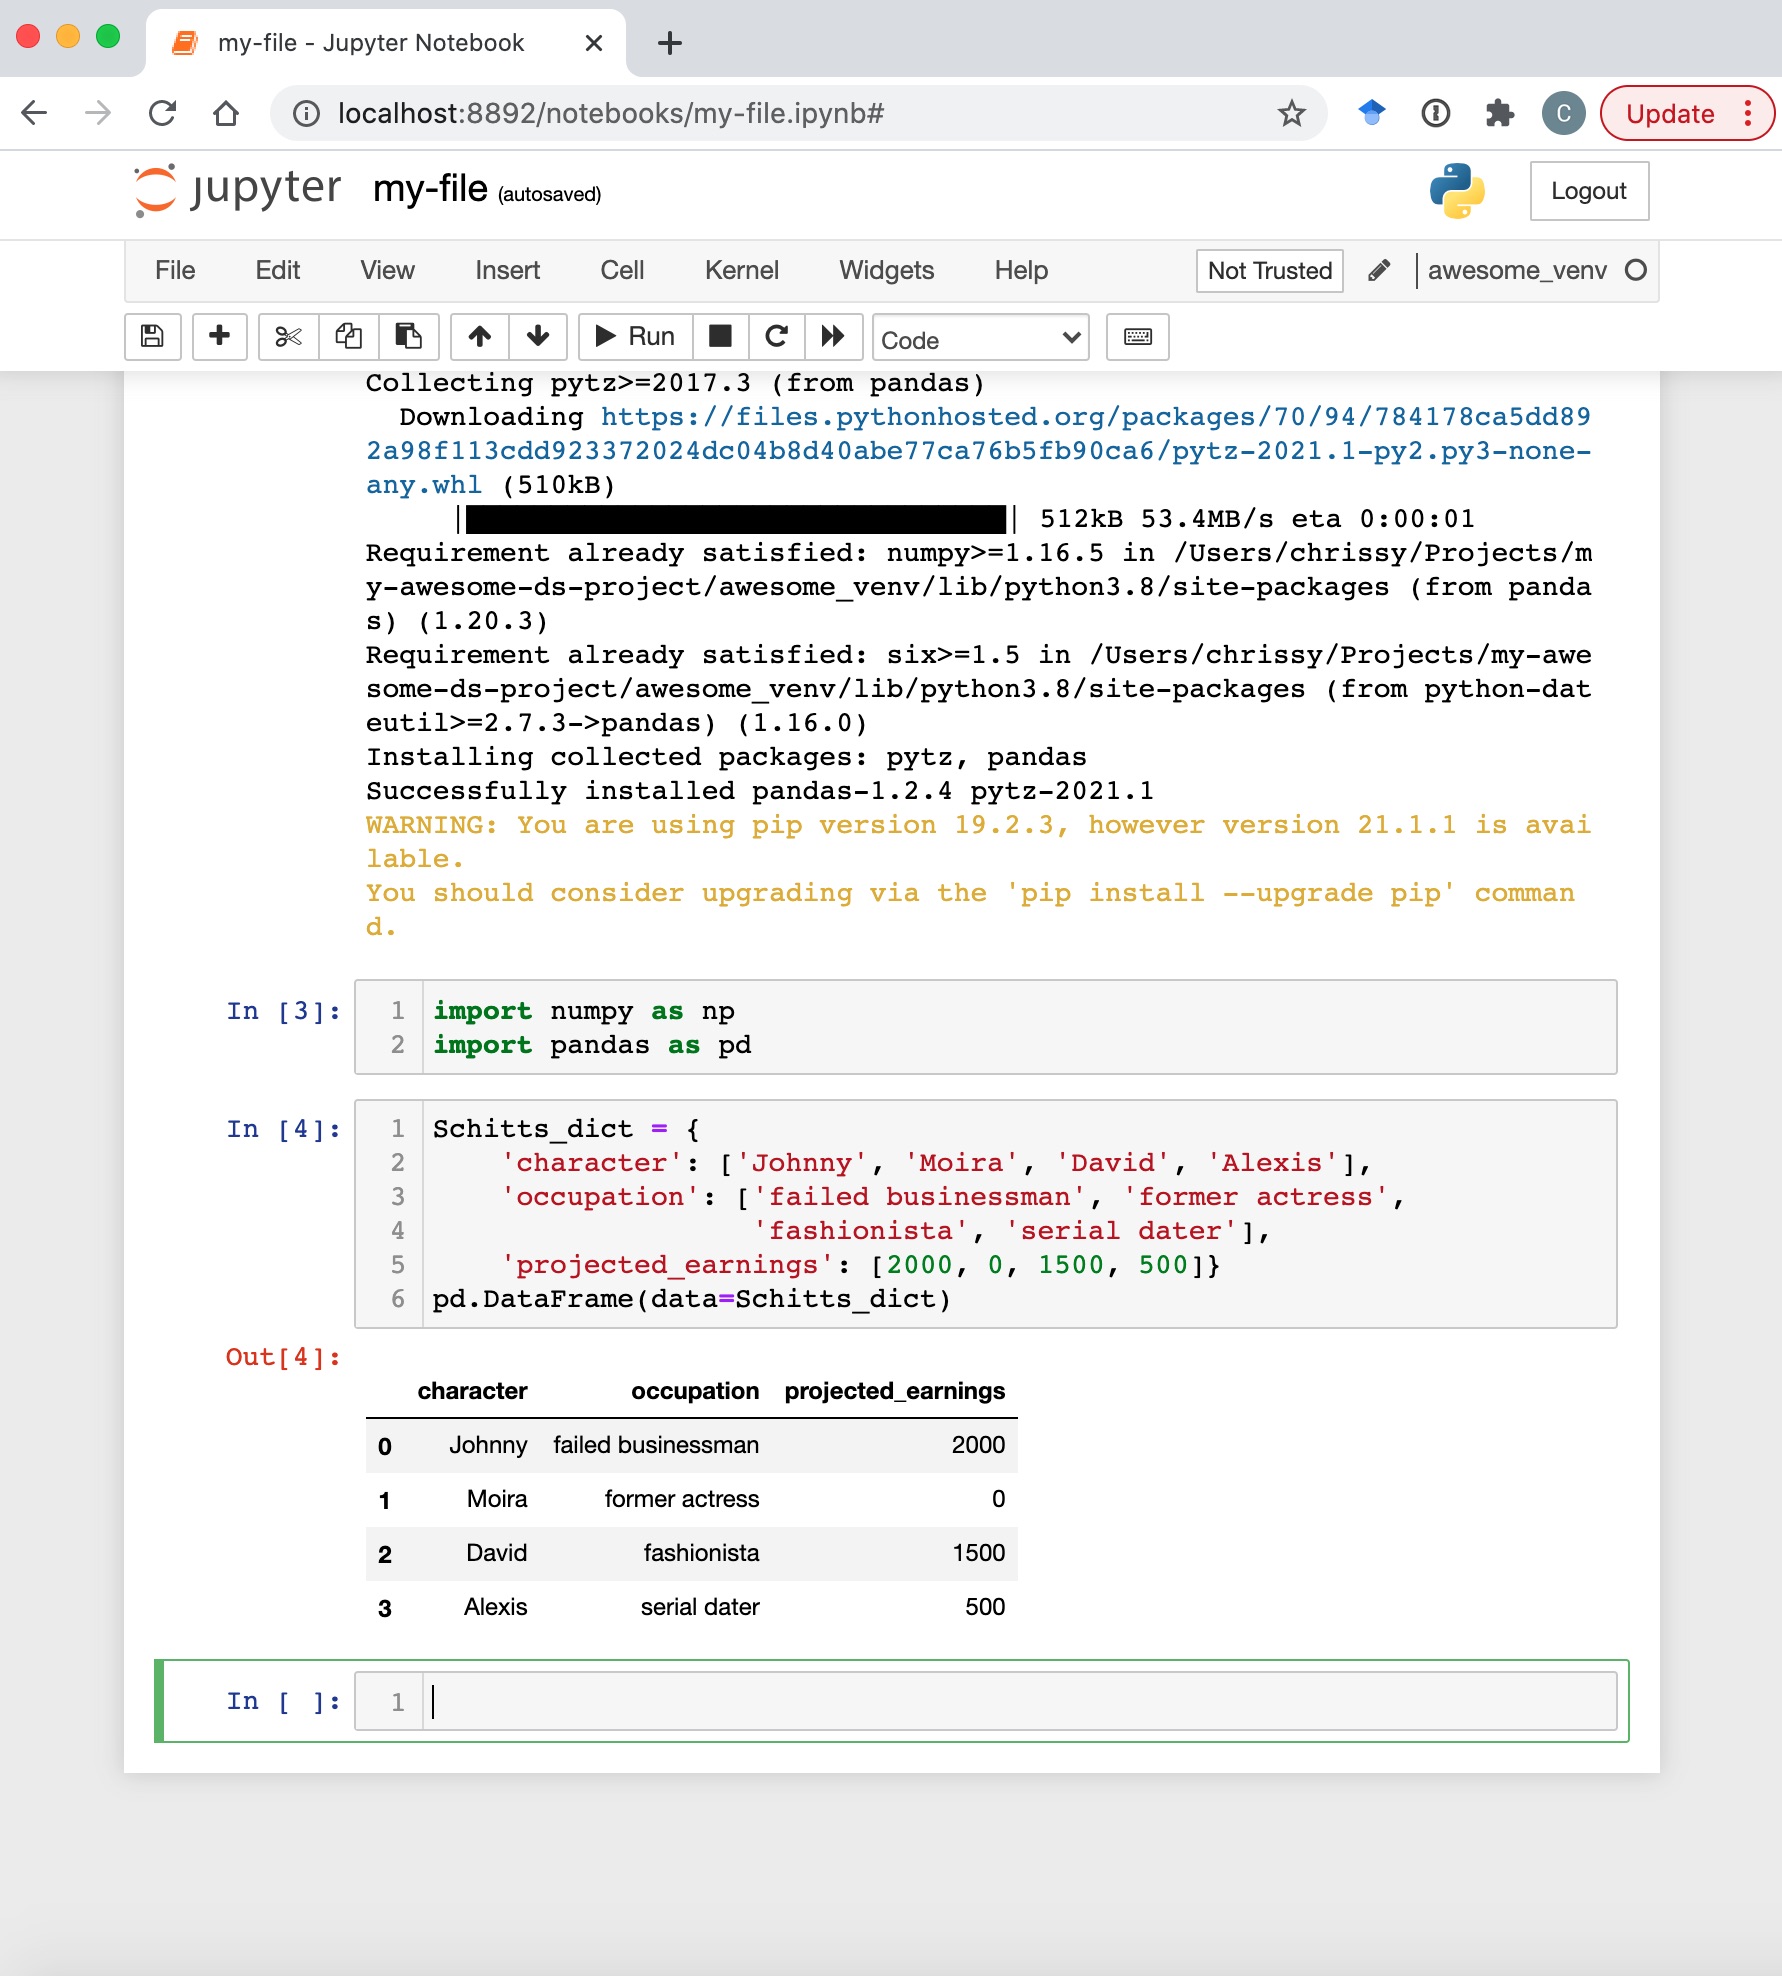 And that’s all there is to it! Before I move onto the conda method, I just want to go over how to manage the venv environment.
Managing environments#
So it might have occurred to you that installing packages one-by-one might get a little tedious. Luckily, there’s a solution for that. But before I get on to how to install those dependencies en masse, let’s take a little detour (there’s a point, I promise).
So you’re working on a project, and your colleague, Jenny, decides that the awesome new model you built could be useful for something that she’s working on. The question is, how does she set up her environment so that she can be sure that the model will run on her system without a hitch? Enter the requirements.txt file, which allows us to make our environment reproducible for others and, thankfully, is super simple to create.
(awesome-venv) % pip list #not strictly necessary
(awesome-venv) % pip freeze > requirements.txt
After completing the second command, your project folder will look like this:
my-awesome-ds-project
|––README.md
|––awesome_venv
|––data
|––models
|––notebooks
|––references
|––reports
|––requirements.txt			#hello!
|––src
|––tests
This is super important when distributing your project because, if Jenny were to try to pull down your project from your GitHub repository and use your virtual environment, it could cause major problems, for instance, if she’s running on a different operating system. To minimise the guesswork, it’s best to stick with requirements.txt files (for now at least), and remove your venv files when uploading to a repository.
Coming back to the issue of installing multiple dependencies at once, all Jenny would need to do, once she’s cloned your repository, is to create her own virtual environment and install the requirements.txt file:
Jenny% cd test-project
Jenny% python3 -m venv test-venv/
Jenny% source test-venv/bin/activate
(test-venv) Jenny% pip install -r requirements.txt
Now Jenny is up and ready to go!
One final thing. When you’re done in your environment and want to go back to running commands in your global machine, use the deactivate command to return to the “status-quo”:
(awesome-venv) % deactivate
%
Troubleshooting#
Of course, life isn’t easy. There might still be some issues that crop up with dependencies between your global and virtual machines. If that happens, the easiest fix is to remove the old virtual environment, and recreate it from your own requirements.txt file:
% rm -r awesome-venv/
% python3 -m venv wonder-venv/
% source wonder-venv/bin/activate
(wonder-venv) % pip install -r requirements.txt
You should be operational at this point, but if not, I refer you to the forums of many frustrated venv users.
Using and managing virtual environments – the workflow with conda#
Now, the very cool thing about conda environments is that a) the environment is language agnostic, which means that you can use other languages if you’re multilingual (I won’t be doing this here, but for a very good post, read https://towardsdatascience.com/a-guide-to-conda-environments-bc6180fc533) and b) conda does the job of both pip and venv and both manages the packages you install and the environment itself. Neat, huh?
To create an environment with conda for Python, you can use the following command (replacing awesome-conda-env with the name of your choice):
% conda create --name awesome-conda-env python
Conda is smart. If there is a specific library you need to install, you could simply name the package during the installation step, and conda would work out which dependencies and language you are using. The recommendation from conda is that all packages are installed at once for this reason – because dependencies are managed during installation, there may be a problem later on – the last package you install typically will determine the outcome of dependency conflicts. See the documentation
for more details.
% conda create --name awesome-conda-env numpy
Finally, you can activate your environment and install packages:
% conda activate awesome-conda-env
(awesome-conda-env) % conda install numpy=1.20.1 pandas=1.2.4
(awesome-conda-env) % conda install jupyter notebook
By explicitly telling your environment the specific packages you wish to use, you essentially “pin” the environment to using these versions unless you update them manually.
Some packages are not available through the [Anaconda Repository()], but instead can be found through Anaconda Cloud, which provides access to various channels, including conda-forge and bioconda . For these, a small modification will be needed:
(awesome-conda-env) % conda install --channel conda-forge ipykernel
- Conda has approximately 25,000 available libraries through Anaconda Repository, conda-forge, and bioconda, but this pales in comparison to the ~150,000 available through PyPI. As a result, you may still need to use pip to install some libraries, as follows – note that you do not have to install
pipseparately because it is already included within anaconda:
(awesome-conda-env) % pip install datetime
Note that the recommendation from anaconda is that you install all Anaconda packages first, and install pip environments at the end of your modifications to your environment. The reason for this is that the conda environment is less able to manage dependencies for pip-installed libraries, and modifications made after installing libraries via pip might break your environment. Thankfully, conda keeps track of where your packages where installed from (Note: there are many automatically-installed packages to manage dependencies, but for ease of reading I have trimmed the view below):
(awesome-conda-env) % conda list
# packages in environment at /Users/user_name/opt/anaconda3/envs/awesome-conda-env:
#
# Name                    Version                   Build  Channel
datetime                  4.3                      pypi_0    pypi
ipykernel                 5.5.5            py39h71a6800_0    conda-forge
ipython                   7.23.1           py39h71a6800_0    conda-forge
jupyter_client            6.1.12             pyhd8ed1ab_0    conda-forge
jupyter_core              4.7.1            py39h6e9494a_0    conda-forge
numpy                     1.20.1           py39hd6e1bb9_0
numpy-base                1.20.1           py39h585ceec_0
pandas                    1.2.4            py39h23ab428_0
pip                       21.0.1           py39hecd8cb5_0
python                    3.9.4                h88f2d9e_0
One small point to note is that unlike venv, where your environment is a directory in your project folder, creating conda virtual environments as in my example above is easiest, but will require that you name each of your environments different names, since they will all be stored in the same env directory. To list them, use the following command (note the * indicates the default env – since I performed the command while inside my active environment, it shows awesome-conda-env as being default, but outside the env, your base will be default):
(awesome-conda-env) % conda env list
# conda environments:
#
base                     /Users/user_name/opt/anaconda3
awesome-conda-env     *  /Users/user_name/opt/anaconda3/envs/awesome-conda-env
Finally, to get up and running in Jupyter notebooks as before, you will need to run the following:
python -m ipykernel install --user --name=awesome-conda-env
There are some tricky things about conda, such as where your environments live and different installation methods based on where the packages can be found – be that Anaconda Repository, other Conda repositories, such as Anaconda Cloud, or the PyPI library. It’s worth seeing whether the package you want to use is available (and updated frequently) through Anaconda before installing via pip to avoid dependency hell. However, the advantages of using conda might outweigh these difficulties. Because Conda is a cross-platform package, packages installed through Conda are binaries, which means that you don’t require a compiler to install them and, helpfully, this enables packages to be available in C, R, or other languages. As a result, the conda environment manager can contain software written in any languages, and has a satisfiability solver to verify that all requirements of all packages installed in an environment are met (and will notify you if there is a discrepancy), so long as you use conda’s package manager rather than pip. In this sense, conda environments can be a little more reliable. Additionally, you can potentially work with different versions of Python in the same environment (if that is something you need). This article
is a great resource for understanding more of the advantages of using conda over pip.
Managing your conda environment#
As before, we need to make our environment reproducible for others by including a file in the project’s root directory listing packages installed along with their version numbers. With conda, instead of creating a requirements.txt file, we create an environment.yml file as follows:
(awesome-conda-env) % conda env export --file environment.yml
Given an environment.yml file, you can then easily re-create an environment:
% conda env create --name test-env --file /path/to/environment.yml
Note that, unfortunately .yml and .txt files cannot be used interchangeably between environments, so this might be something to consider when working on a team with people who mostly use venv, for instance.
One really cool thing about conda is that if you are someone who uses a core set of packages, say numpy and pandas, you can set up your anaconda configuration so that these packages are installed as standard in any new environment:
% conda config --add create_default_packages numpy=1.20.1 pandas=1.2.4
This can ultimately save you so much time if you consistently need to install multiple packages each time you create an environment.
Finally, to deactivate your environment, simply run
(awesome-conda-env) % conda deactivate
%
Summary#
There’s a lot of information packed into this post, so here are the key points to take away.
Virtual environments help to:
- Resolve dependency issues by allowing you to use different versions of a package for different projects if needed, or even install packages regardless of whether you have admin privileges on that machine.
- Make your project self-contained and reproducible.
- Keep your folders tidy!
Whether you use conda or venv largely comes down to personal preference, but:
venvenvironments tend to run a little faster, and can be operated from inside your project folder, keeping all your project needs in one place.venvitself has no dependency manager, but there are packages out there, such as poetry that act more like conda (I just haven’t quite managed to get around to trying it out yet!).condaacts both as an environment and package manager, and ensures that dependencies are met for all conda-downloaded packages (note that while you can install PyPI packages viapip, conda is less able to manage those dependencies). As a result, packages take slightly longer to download, but this might be worth it in the long run! Conda is also language-agnostic, if you frequently operate in, say, R as well as Python. This means that you won’t have to use different workflows when working in different languages!- Both environments can be easily integrated with Jupyter notebooks to create Data Science projects!
I’ve included a table of the key commands you need in your venv and conda environments for common commands:
venv | conda | |
|---|---|---|
| creating a new environment | python3 -m venv [PROJECT_NAME] | |
| activating an environment | source [PROJECT_NAME]/bin/activate | conda create --name [PROJECT_NAME] python |
| installing libraries | pip install [PACKAGE_NAME] | conda install [PACKAGE_NAME] |
conda install --channel conda-forge [PACKAGE_NAME] | ||
pip install [PACKAGE_NAME] | ||
| setting up a kernel in Jupyter notebook | python -m ipykernel install --user | python -m ipykernel install --user --name=[PROJECT_NAME] |
| view packages in environment | pip list | conda list |
| saving environment settings | pip freeze > requirements.txt | conda env export --file environment.yml |
| create environment from saved file | pip install -r requirements.txt | conda env create --name [PROJECT_NAME] --file /path/to/environment.yml |
| deactivate environment | deactivate | conda deactivate |
I hope this post has been helpful to you reading and following along as it has for me writing it! If you’re interested in other stuff I have to say, please feel free to follow me on LinkedIn or GitHub .
Until next time!
Post-script
Once you have finished with your virtual environment, you might find you want to declutter the list of available kernels in your Jupyter Notebook. To do this, you can list the available kernels from the terminal and remove your choice using the commands below:
% jupyter kernelspec list
# Available kernels:
  awesome-conda-env                                                    /Users/user_name/Library/Jupyter/kernels/awesome-conda-env
  python3                                                              /Users/user_name/Library/Jupyter/kernels/python3
  awesome_venv                                                         /usr/local/share/jupyter/kernels/awesome_venv

% jupyter kernelspec uninstall awesome_venv awesome-conda-venv